
Start from UI
Get started with Freeplay's UI to create, test, and improve your AI prompts—no coding required. Step-by-step guide with video walkthrough.
Getting Started from Freeplay's UI
Get started with Freeplay's UI to create, test, and improve your AI prompts—no coding required. This guide walks you through creating your first prompt, building a dataset, setting up evaluations, and running tests. Let's jump in!
1. Create Your Project

Start by creating a new project in Freeplay. Projects help you organize prompts, datasets, and evaluations by feature or use case.
Log into Freeplay, click "Create Project", and give it a descriptive name like "Customer Support" or "Content Assistant". Once created, note your project ID from the project overview—you'll need this for SDK integration later.
Your empty project is now ready. Let's build your first prompt.
Need help with initial setup? Check out our Account Setup Guide for configuring models, API keys, and team permissions.
2. Build Your Prompt Template
Launch the Prompt Playground
From your project, click "Create a prompt template" to open the prompt playground. This is where you'll design and test your prompts.
A Prompt Template(s) is made up a model, prompt messages, tools and an optional schema. The prompt playground allows you to try different combinations of these components in order to find the best combination.
Select Your Model
Start by choosing the model you want to use from the dropdown. You'll see options like OpenAI (GPT-4, GPT-3.5), Anthropic (Claude), Google (Gemini), and other configured models. Some models may need to be set up in settings first, but you can use Freeplay's APIs to get started quickly.
Add Your Messages
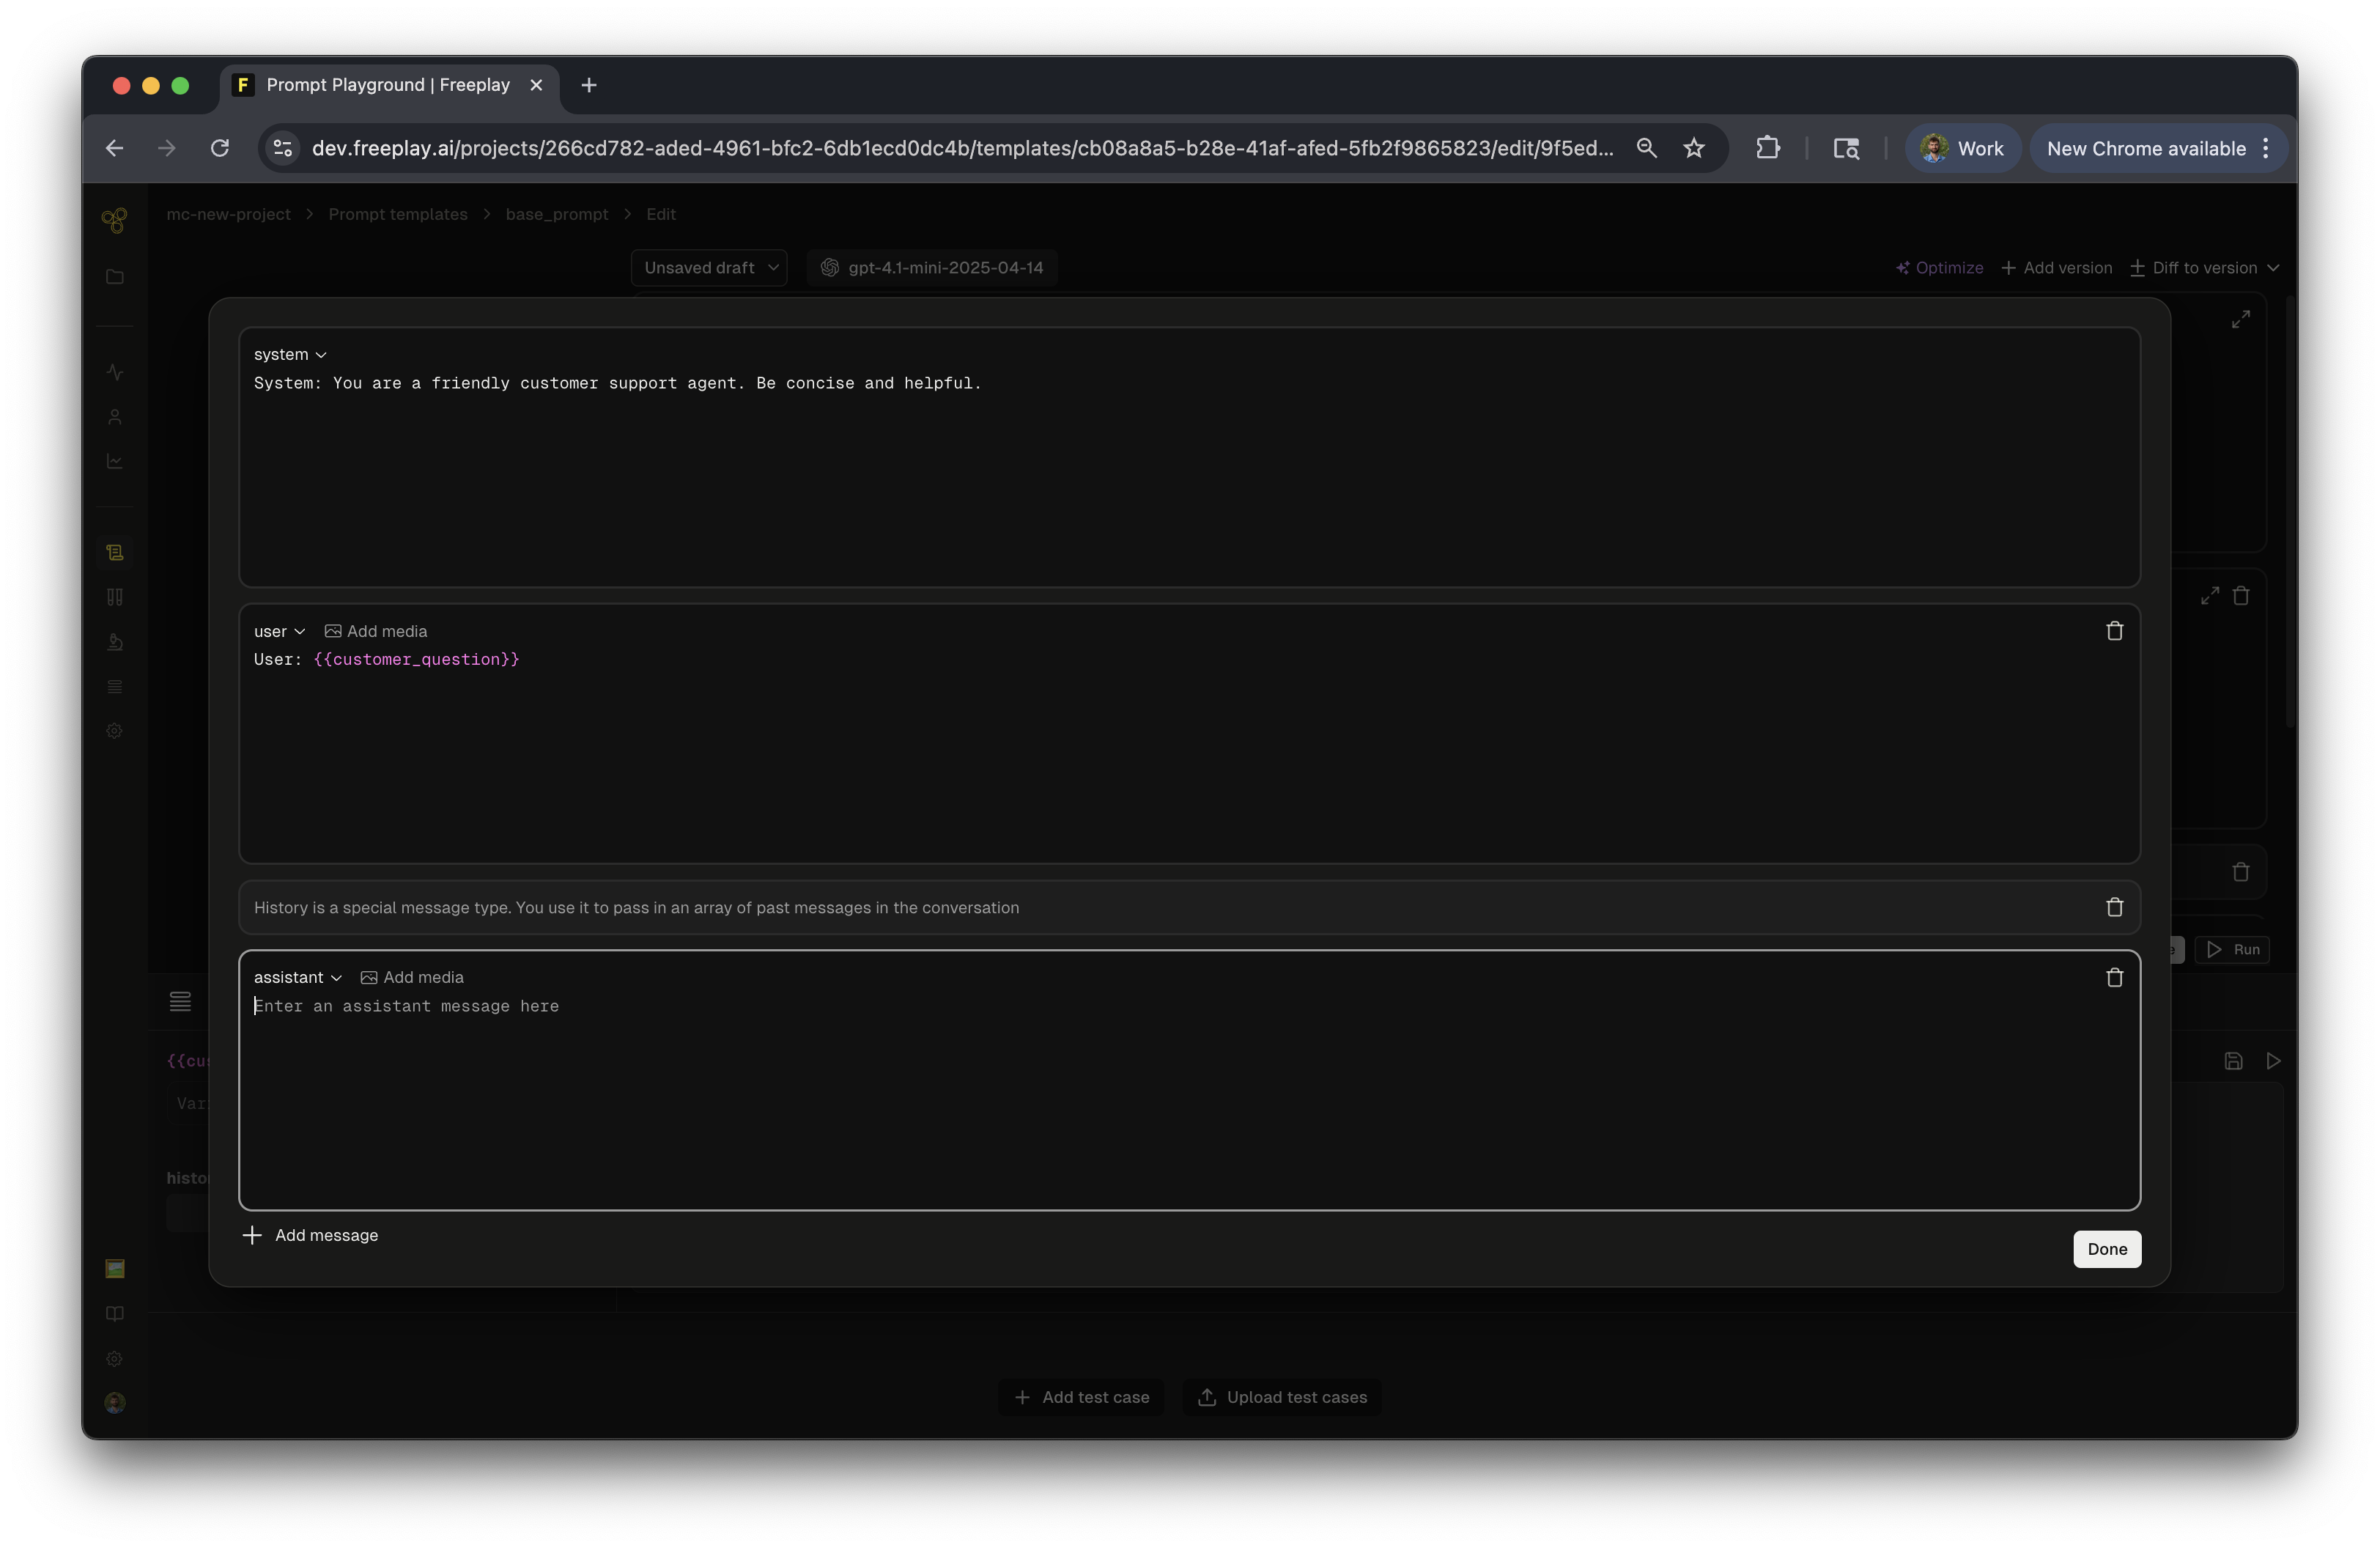
Next, build your prompt by adding messages. Freeplay provides several message types, each serving a different purpose:
System Message
Sets the AI's behavior and personality. Think of this as your base instruction that defines how the AI should act throughout the conversation. For example: "You are a helpful AI assistant that provides clear and accurate information."
User Message
Represents the input from your end user. This is where you'll typically use variables to make your prompt dynamic. For example: {{user_question}}
Assistant Message
Pre-filled AI responses that serve as few-shot examples. Use these to show the AI the style and format you want in its responses.
History
A special message type within Freeplay that represents conversation history. This makes it much easier to review and understand the context flowing through your LLM system, especially in multi-turn conversations.
Variables
Using Variables: Use {{variable_name}} syntax to create dynamic inputs. Variables are key to making your prompts flexible—they let you test how your prompt responds as inputs change, making iteration faster and more effective.
Configure Advanced Settings
Beyond messages, you can fine-tune your prompt's behavior. Set temperature, max tokens, and other model parameters as needed. You can also add tools for function calling or enable structured outputs to ensure consistent response formats.
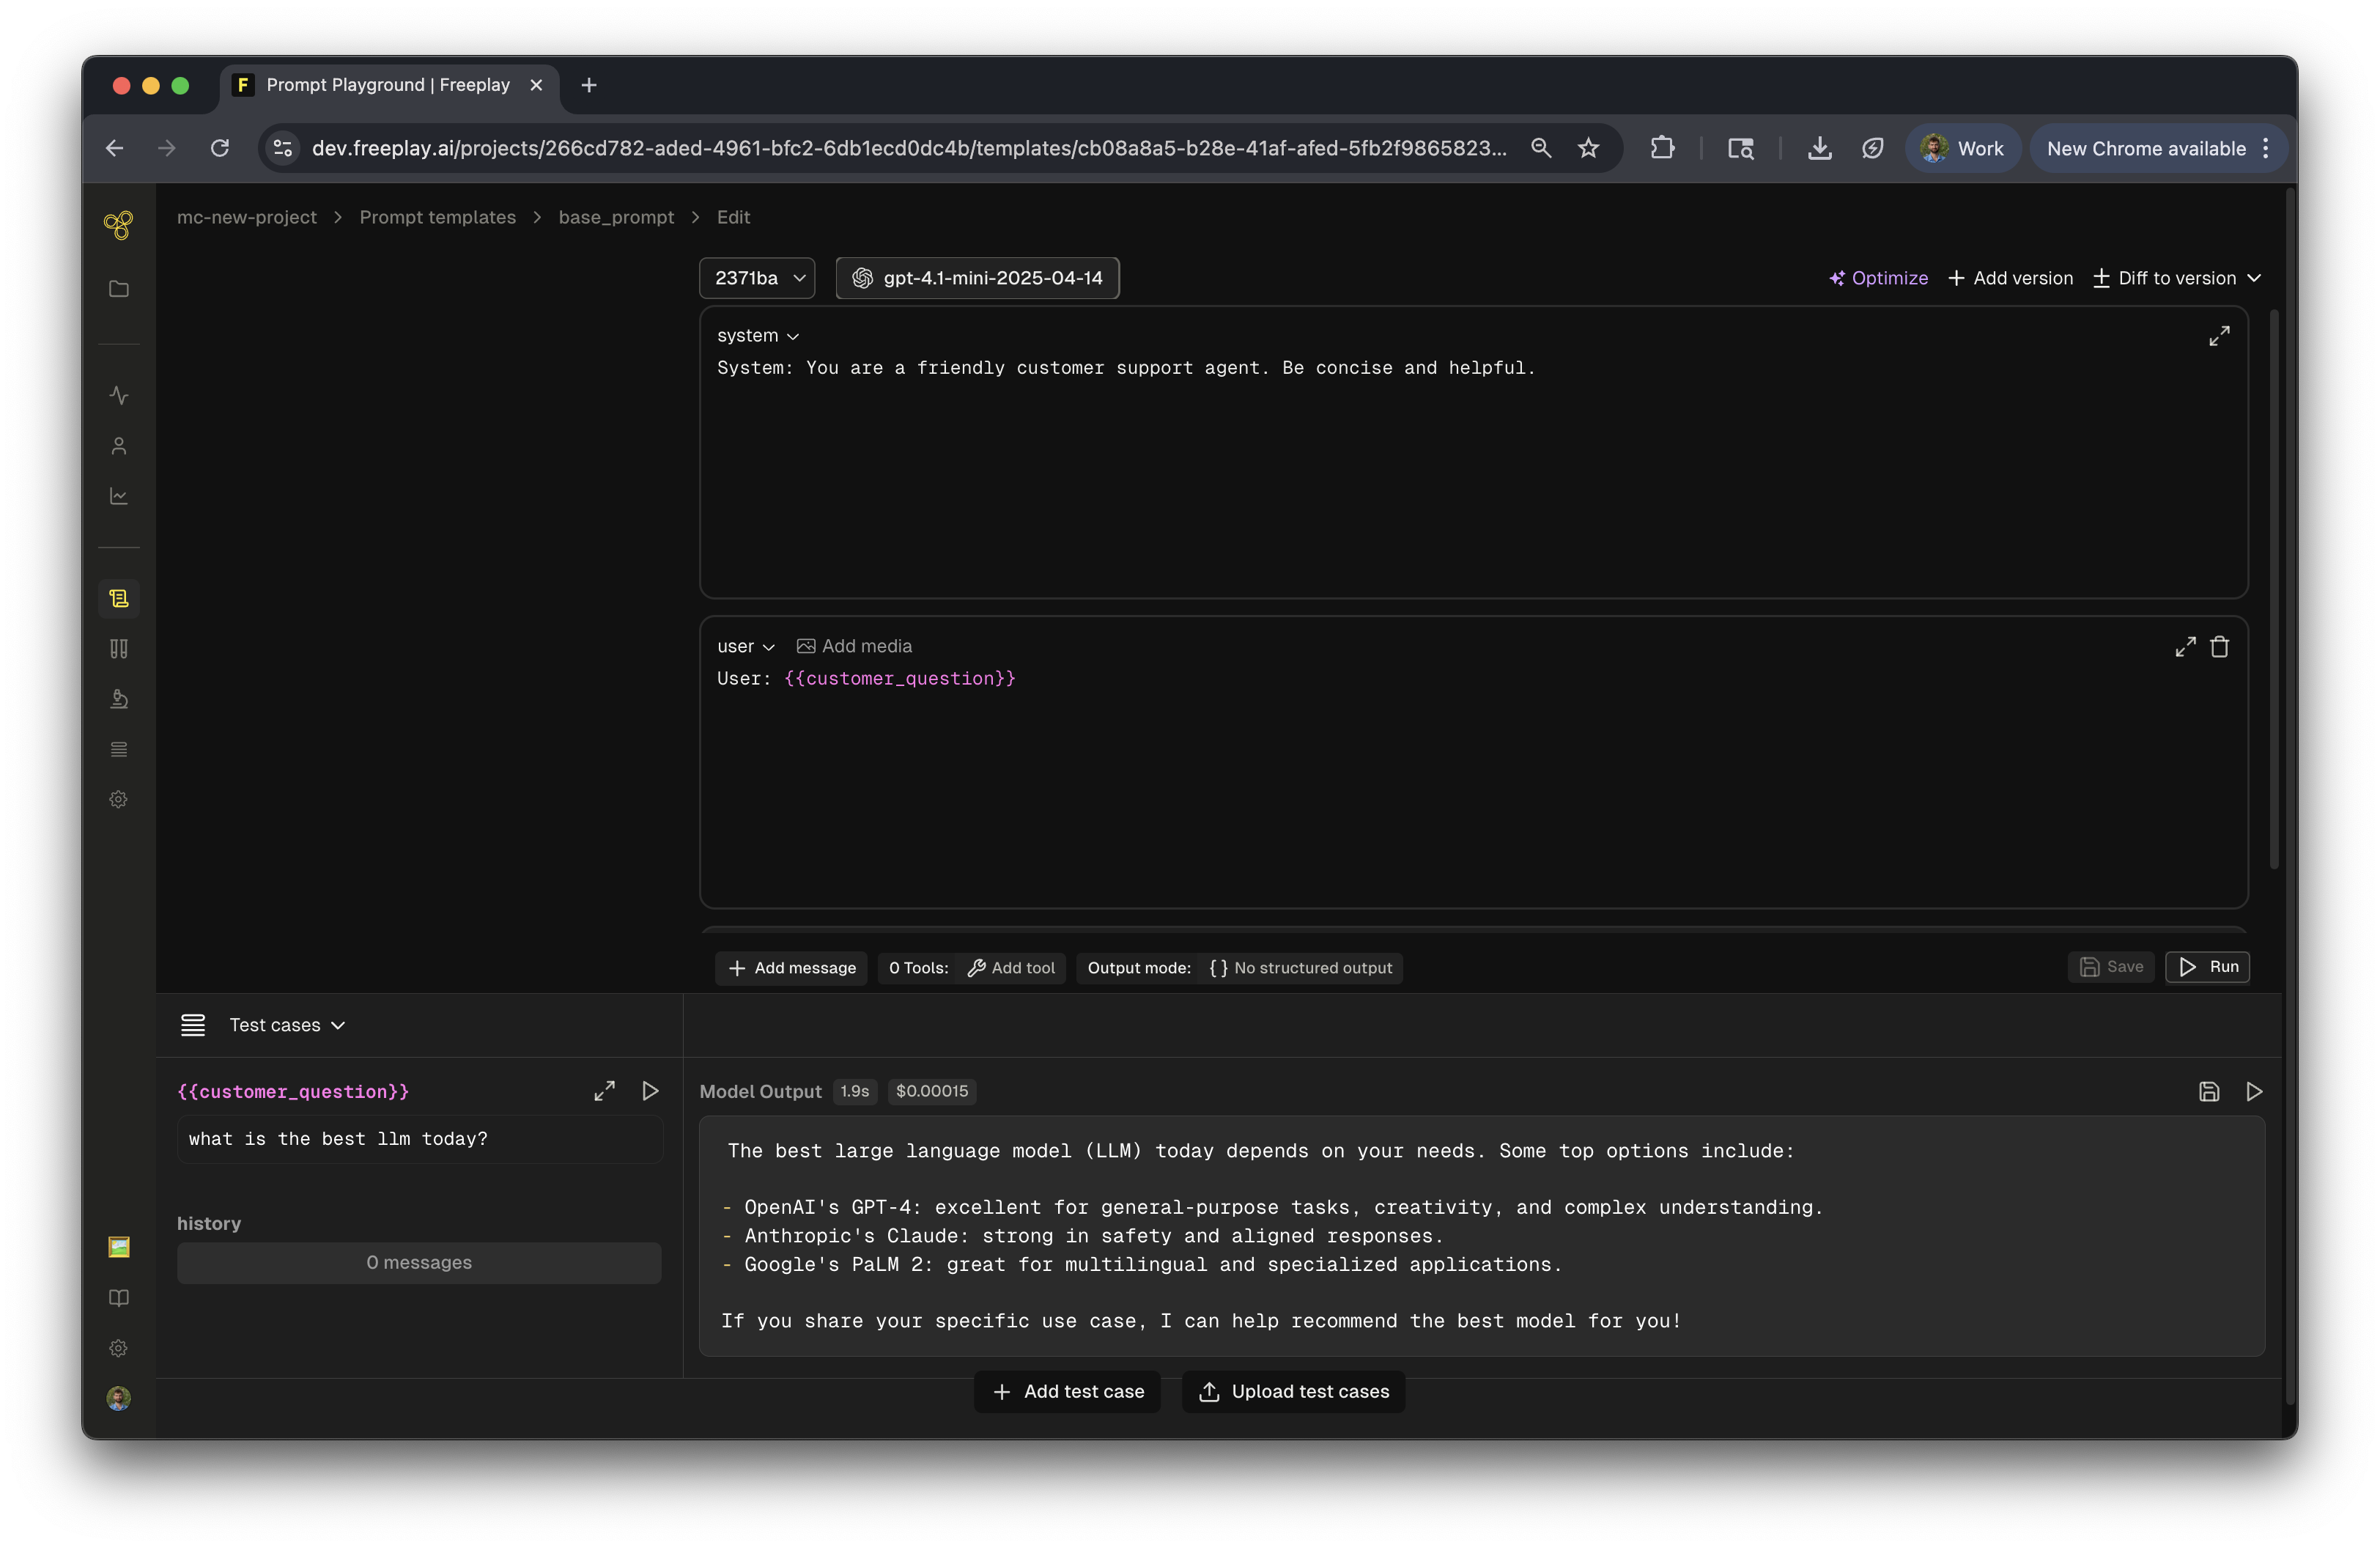
Test in the Playground
Before saving anything, test your prompt right in the playground. Enter values for your variables in the right panel, click "Run", and see how the AI responds. This tight feedback loop lets you iterate quickly and refine your prompt until it feels right.
Save Your Prompt
Once you're satisfied with your initial version, click "Save" and name your prompt template. Add a version name and description to help your team understand what changed—this becomes especially valuable as you iterate over time.
You've now created your first prompt in Freeplay! Saving unlocks testing, evaluation, and deployment capabilities.
From here, most teams jump straight into running a test against a dataset to measure performance and catch issues early. When you're ready to use this prompt in your application, you can integrate it via the SDK to fetch prompts dynamically. And once everything's validated, you can deploy to different environments like production, sandbox, or dev to control your releases. Set these deployment environments at your account settings, more information can be found here.
Let's continue on and create a dataset so we can test our prompt against it!

3. Create Your Dataset

Before running tests, you need a dataset to test against. Think of datasets as your test suite—they contain the inputs you want to test and the expected outputs you're aiming for. This is how you'll measure whether your prompt is actually performing well.
Set Up Your Dataset
Head to "Datasets" in the sidebar and click "Create a dataset". Give it a descriptive name like "Golden Set 1" and optionally add a description to remind yourself (and your team) what this dataset is for. Select the prompt template you want to test—in this case, your "Base Prompt"—and click "Create".
Add Your Test Cases
Now you need to populate your dataset with test cases. You have two ways to do this, depending on how many cases you're adding and where your data lives.
Manual Creation
If you're starting small or adding a few cases, create manual examples directly in Freeplay. Click "Add manual example" and enter the input for your variable—something like "What is the best model to use today?". If you're testing multi-turn conversations, you can add history messages to simulate that context. Then enter the ideal output you want to see from the AI, like "The newest and best models...". You can also add metadata for any extra details about this test case. Hit "Save" and you're done.
CSV or JSONL Upload
If you have a lot of test cases or existing data, uploading from CSV is faster. Click "Upload" and download the CSV template Freeplay provides. The template shows you exactly which columns you need: your variable columns (matching your prompt variables), an expected_output column for ideal responses, and an optional metadata column. Fill in your rows, upload the completed CSV, and Freeplay handles the rest. This makes it easy to import dozens or hundreds of test cases at once.
To see more on dataset creation, see our guide here.
4. Create Evaluations

Evaluations automatically measure the quality of your AI's outputs. Setting up evals before running tests gives you objective metrics to track performance over time.
Set Up Your First Eval
Navigate to "Evaluations" in the sidebar, click "Create evaluation", and select the prompt template you want to evaluate (like your "Base Prompt").
Choose Your Evaluation Type
For getting started, we recommend model-graded evals—they let an AI judge the quality of outputs based on criteria you define. Select "Model-graded eval" and choose a template like "Answer Relevance". Freeplay auto-generates a rubric that defines your evaluation criteria using a Yes/No or scoring format. Pick the model you want to use for grading (depending on eval complexity the model can vary), test it against your golden dataset, and click "Save" to publish.
Your first version is ready to use immediately, and you can iterate and improve it over time as you learn what matters most.
There are additional types of evaluations supported in Freeplay. To lean more, refer to the evaluations section of the documentation.
5. Run Your First Test

Now that you have a prompt, dataset, and evaluation(s), you're ready to run a test and see how everything performs.
Start Your Test
Head to "Tests" in the sidebar and click "Run a test". Configure your test by selecting your prompt template, choosing which version to test, picking your dataset, and selecting which evaluations to run. Give your test a name like "Base Prompt Test 1", optionally add a description, and click "Run".
Watch It Run
As the test runs, you'll see completion status in real-time. Results populate as each test case finishes, and evaluation scores are calculated and stored automatically. Freeplay is using your dataset and new prompt to create new outputs for your review. This allows you to conduct a comparison of the original output (stored in your dataset) to the new output generated from your prompt version!
Review Your Results
Once the test completes, click into the results to see how your prompt performed. You'll see the input from your dataset, the new output from your AI, the evaluation results, and the golden (or original) output you defined in your dataset.
This is where the magic happens. Now you can compare how different prompt versions produce different responses, spot patterns in what works and what doesn't, and identify areas for improvement. You can mark the best outputs, export results for deeper analysis, and use these insights to iterate on your prompt.
Iterate and Improve
You've created your first prompt, dataset, evaluation, and test run—but this is just the beginning. The real power of Freeplay comes from iteration. Every test reveals insights, every insight drives improvements, and every improvement compounds over time making your system better and better!
The Improvement Loop
Jump back into any part of the system to refine your AI application. Review your test results to identify where your prompt succeeds and where it falls short. Update your prompt based on what you learned—maybe the tone needs adjusting, or the instructions need more clarity. Save a new version so you can track changes over time and always roll back if needed. Run tests again to compare your new version against previous results and see if you're moving in the right direction. When you're confident, deploy the best version to production.
Work Your Way
There's no prescribed order—work the way that makes sense for your workflow. Discover an edge case in production? Create a new dataset to test it. Want to measure a different quality dimension? Add another evaluation. Trying out a radically different approach? Test prompt variations side-by-side to see which performs better. The system adapts to how you work, not the other way around.
This iterative approach is how teams systematically improve their AI application's quality over time. Small improvements compound, edge cases get handled, and your prompts get better with every cycle.
Updated about 4 hours ago
Now you can continue to test & iterate, configure more evaluations or get your system logging data to Freeplay