API Reference: Freeplay supports two types of datasets:
- Prompt Datasets (for component-level testing)
- Agent Datasets (for end-to-end testing)
- Golden Set: For detecting regressions vs. your ideal ground truth
- Failure Cases: For tracking failures you observe and testing in the future to confirm they are fixed
- Red Teaming: For managing adversarial test cases and confirming appropriate behavior by your system
- Random Samples: For representative testing across a distributed set of values
Understanding the output field
Every dataset entry has an output field. While not strictly required, we strongly recommend including an output for each example — it plays a central role in evaluations and test runs, and examples without an output have limited utility for testing. There are two primary ways to use the output field:- Golden output: The output represents the ideal, correct response for the given inputs. This is common in golden sets and broad-based datasets where you want to benchmark new prompt versions against a curated standard. When used in test runs or in the playground, these outputs can be viewed to see how the newly generated data compares to the ideal output.
- Failure case: The output captures a real failure observed in production — such as a hallucination, incorrect answer, or off-tone response. This is useful for building targeted datasets that track known issues so you can confirm they are fixed in future prompt versions.
Curating Datasets
Datasets in Freeplay can be curated in one of two ways: by saving completions that are recorded to Freeplay straight from the Sessions view, or by uploading existing test cases to a Dataset.Saving Data from Recorded Sessions
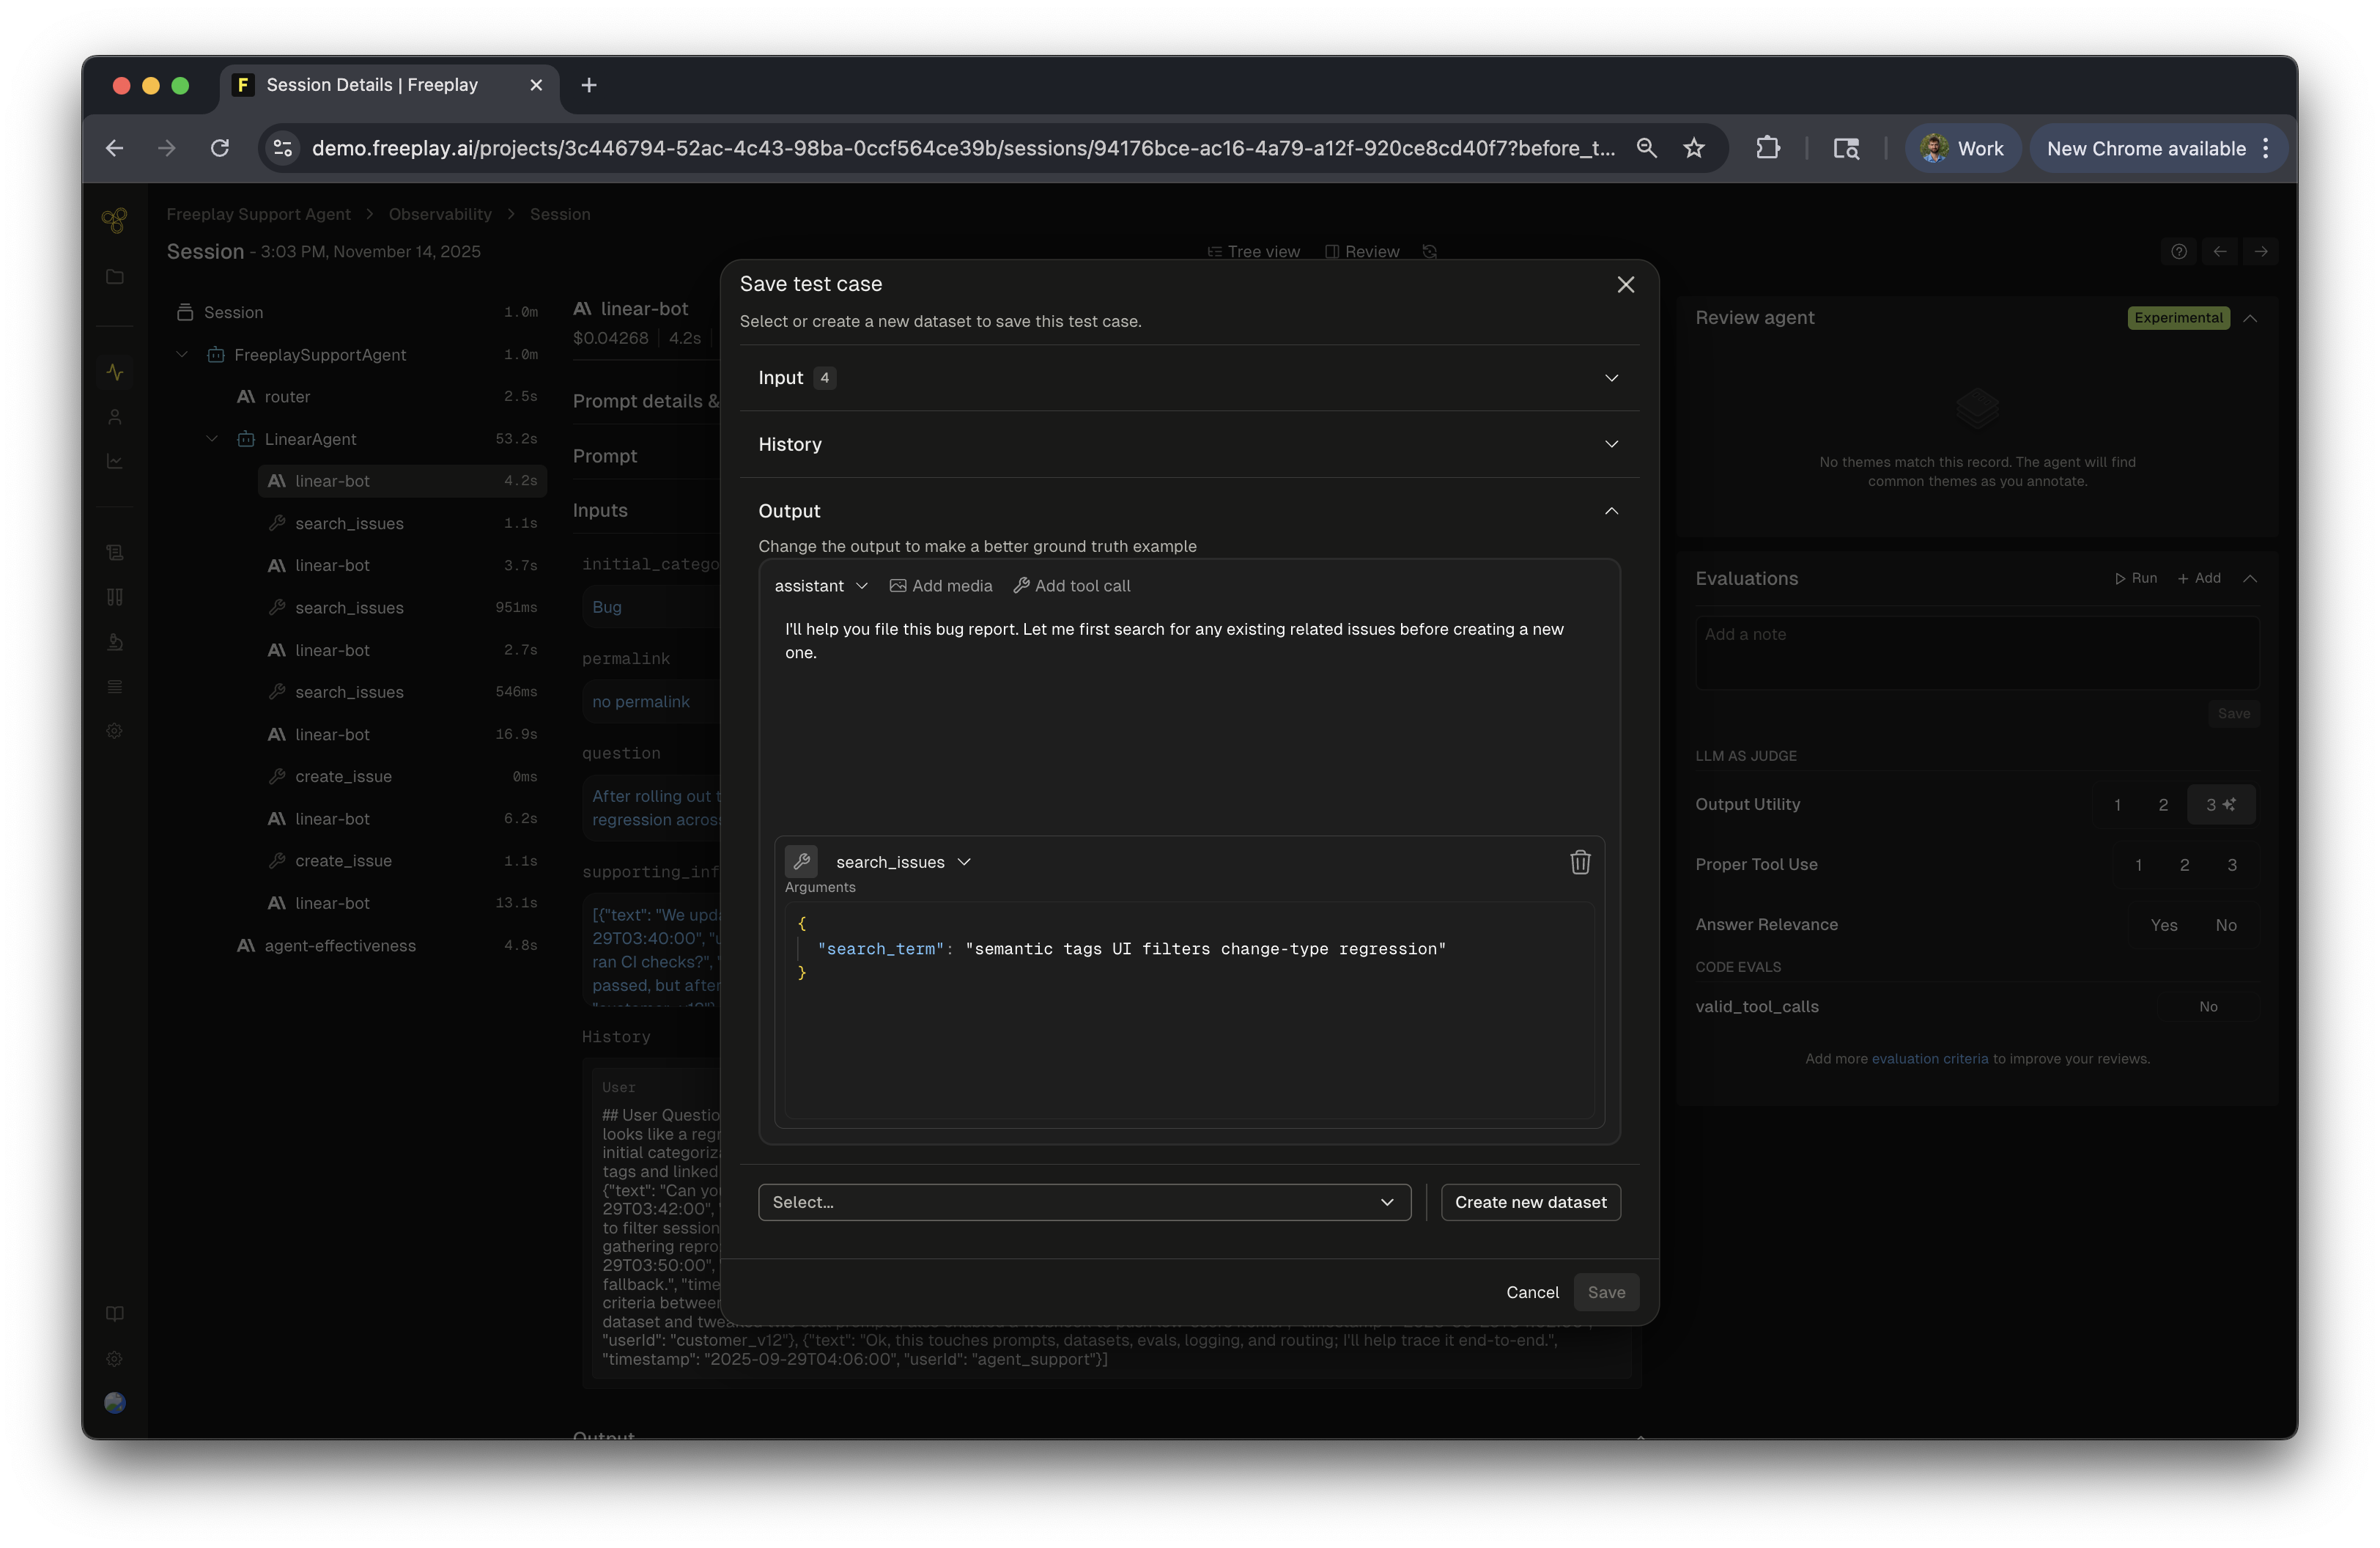
While working with recorded Sessions or Traces in Freeplay, if you encounter values that are relevant for future testing, you can save it directly. You will be given the option to curate the inputs and outputs before saving to the dataset. This can be useful if you want to make this sample represent a specific type of data sample such as a golden or failure case. This can be done at the trace or completion view. To do this, simply:- Click
+ Datasetabove the completion/trace view - Optionally, make adjustments to the inputs, history or outputs
- Select the relevant dataset(s)
- Optionally, click the
+button to create a new dataset from this menu
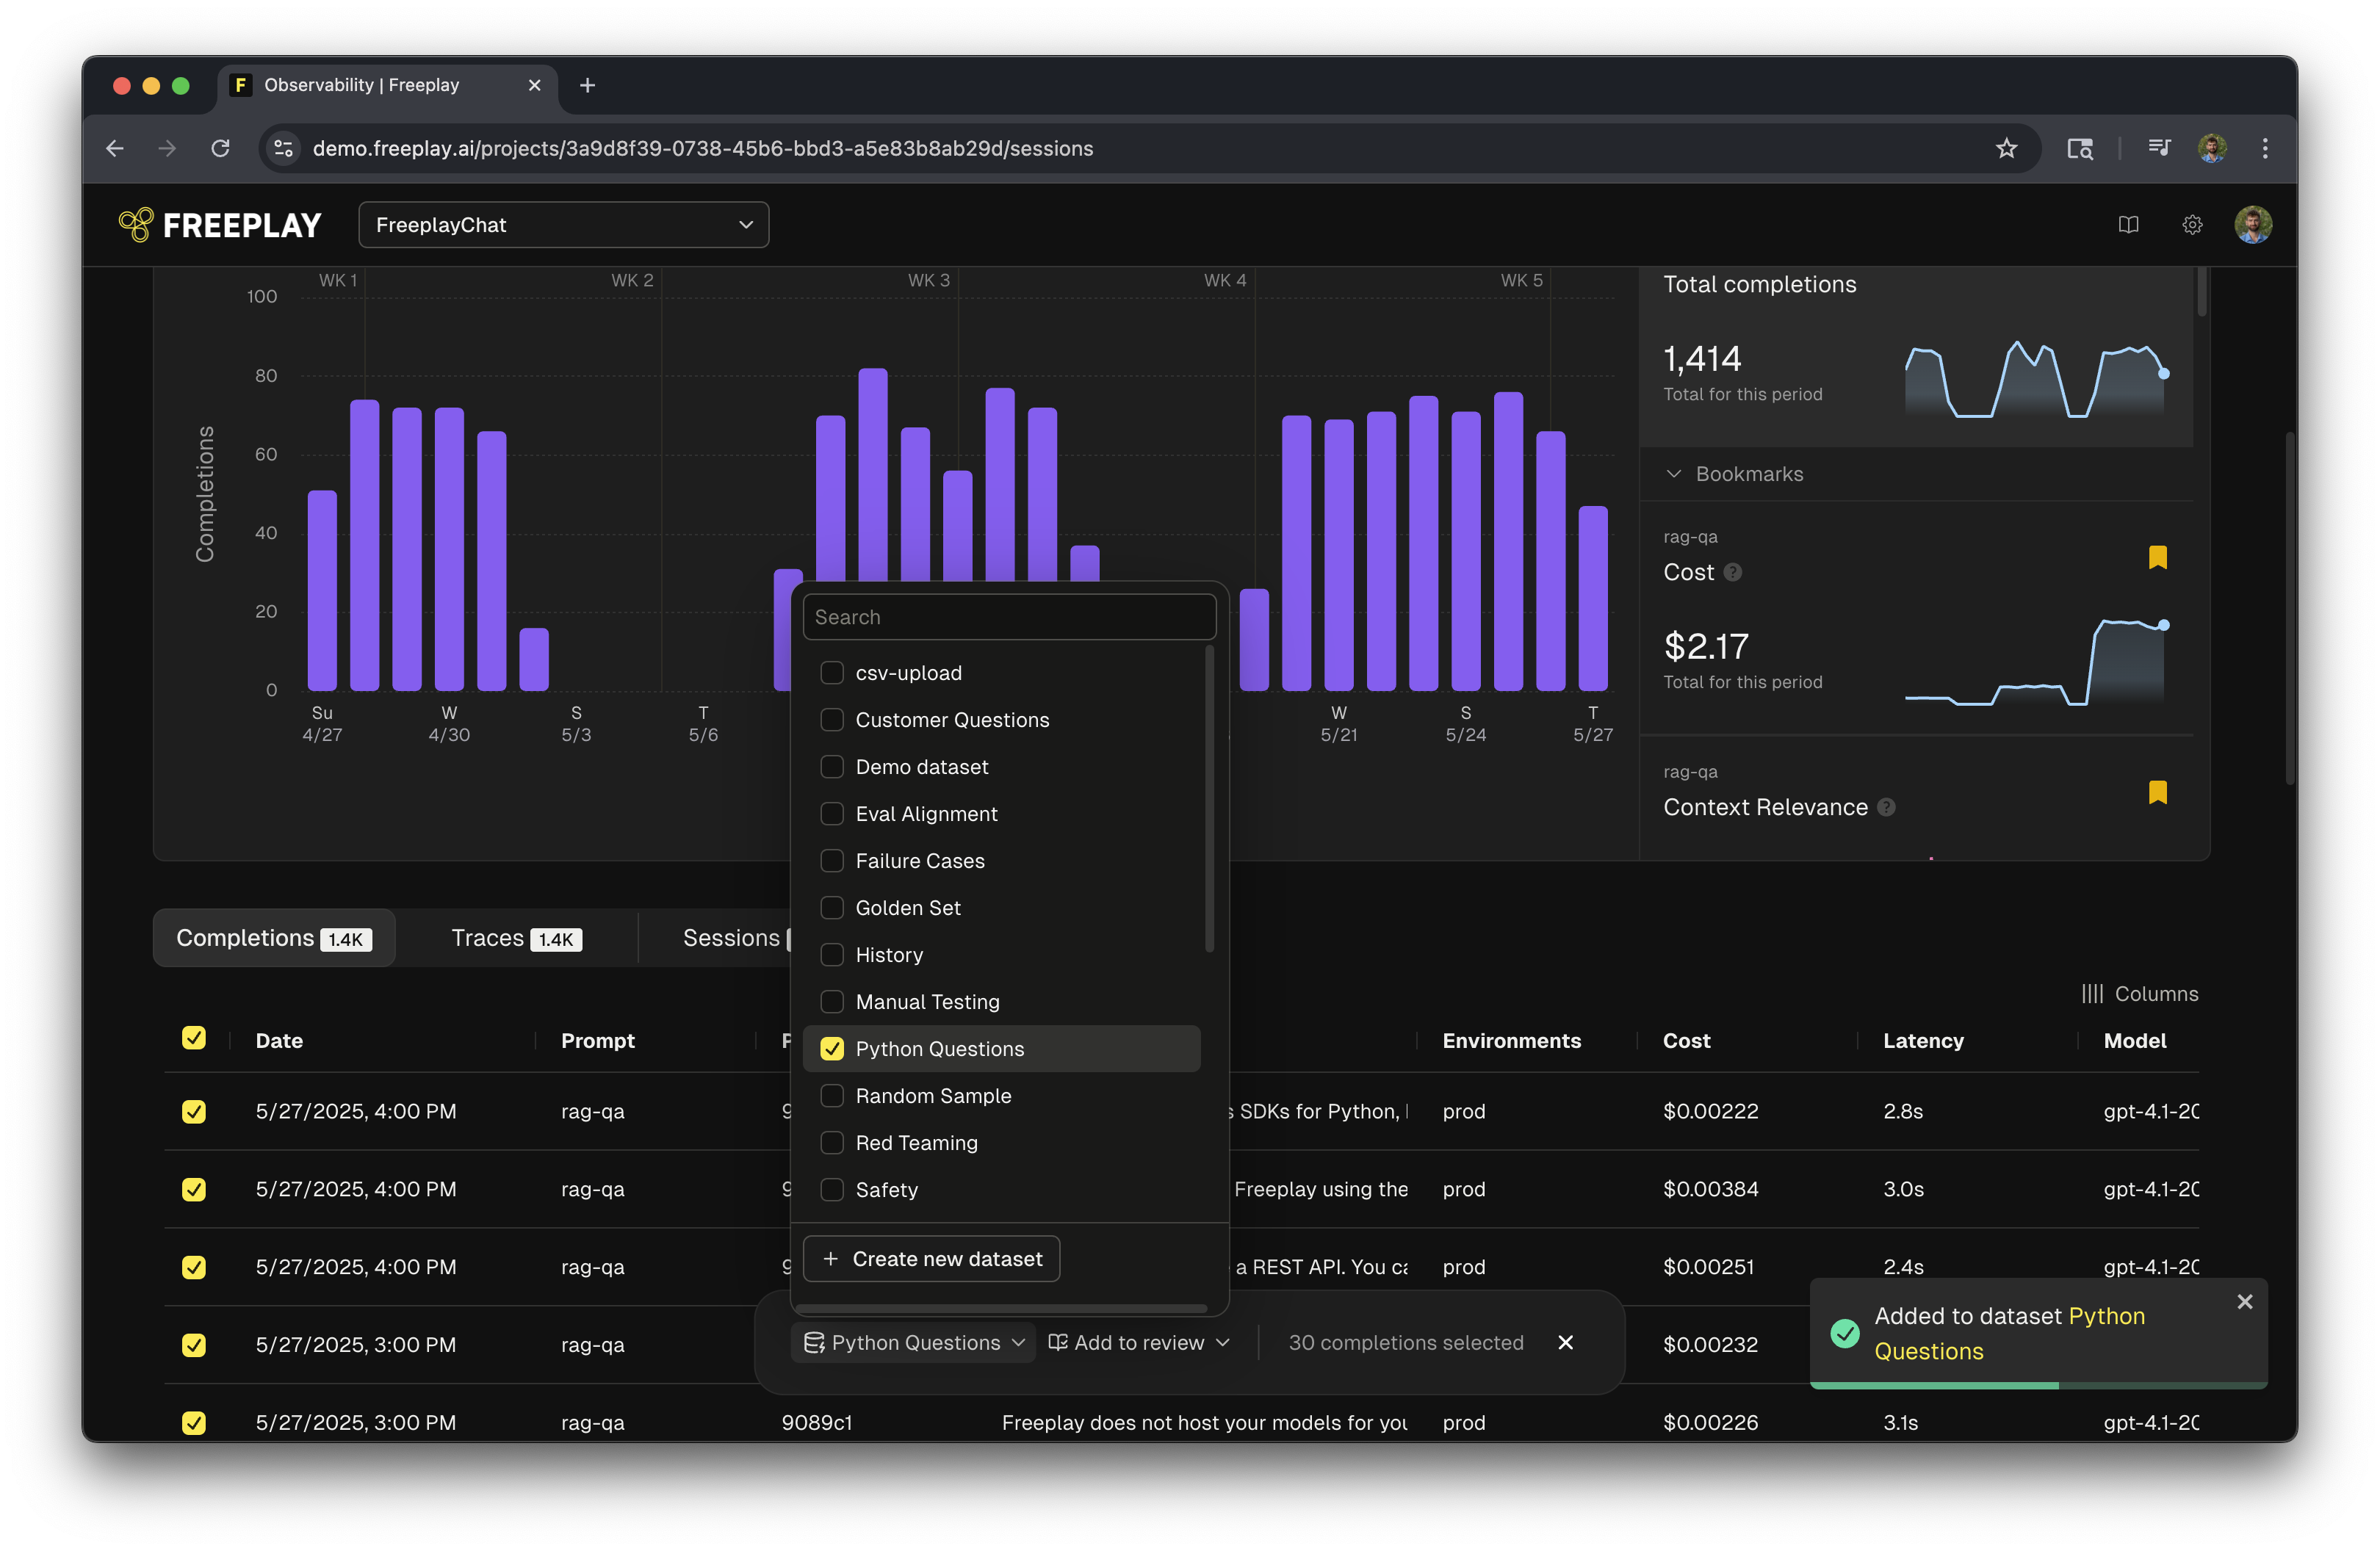
Bulk Add
You can also select multiple completions or traces at once and add a large group of completions to a dataset at one time, even across pages.- Select the “Completions” or “Traces” view on Observability (instead of Sessions)
- Click the radio buttons in the table for the rows you want
Adding Metadata to Dataset Entries
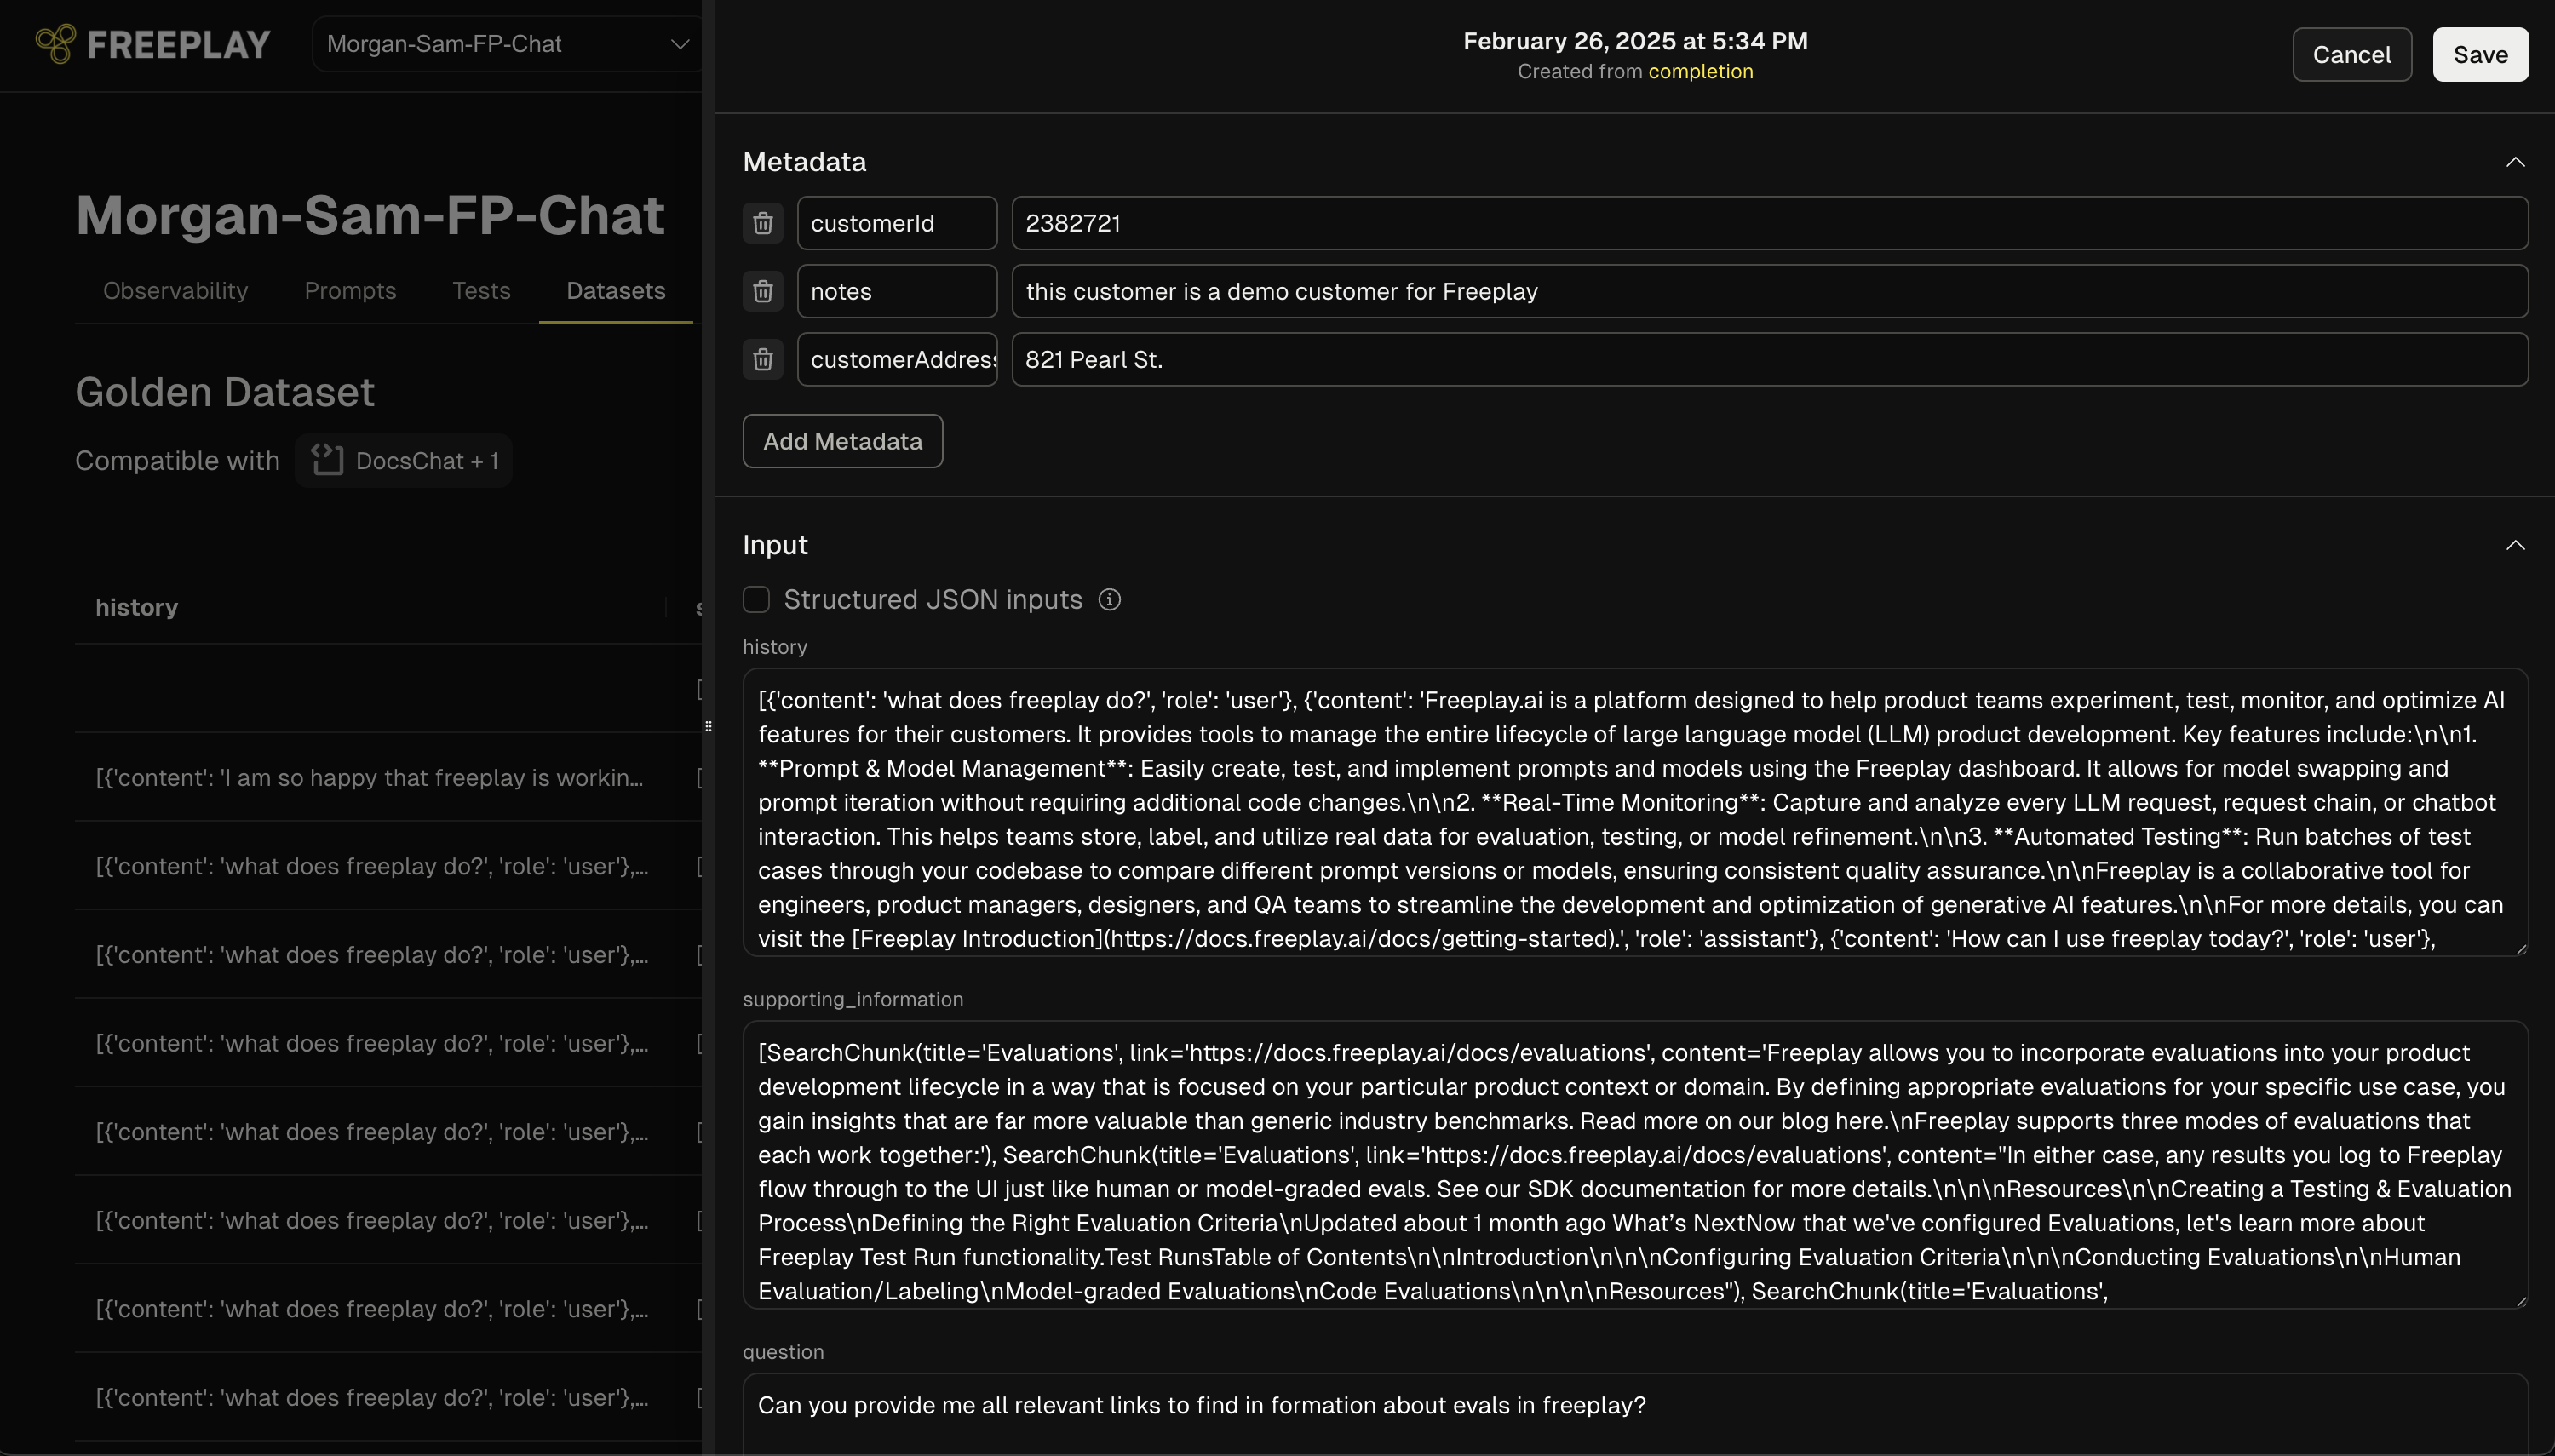
- Navigate to a specific dataset entry
- Click the “Edit” option in the dropdown menu
- In edit mode, you’ll see a dedicated “Metadata” section at the top of the entry
- Add customizable key-value pairs such as:
- Customer identifiers (e.g., “customerId”: “2382721”)
- Click “Add Metadata” to create additional fields as needed
- Click “Save” to store your changes
Uploading Datasets
If you have existing data that is relevant to use for testing prompts in Freeplay, you can upload it directly as a JSONL or CSV file. Both formats support the same fields.Prompt Template Datasets
For more details on variable usage, see our Advanced Prompt Templating guide.
Tool Calls in History: The
history field supports tool call and tool result messages, allowing you to upload conversation histories that include function calling interactions. Assistant messages can contain tool_call content blocks, and user messages can contain tool_result content blocks. See the samples below for examples.How to Upload
-
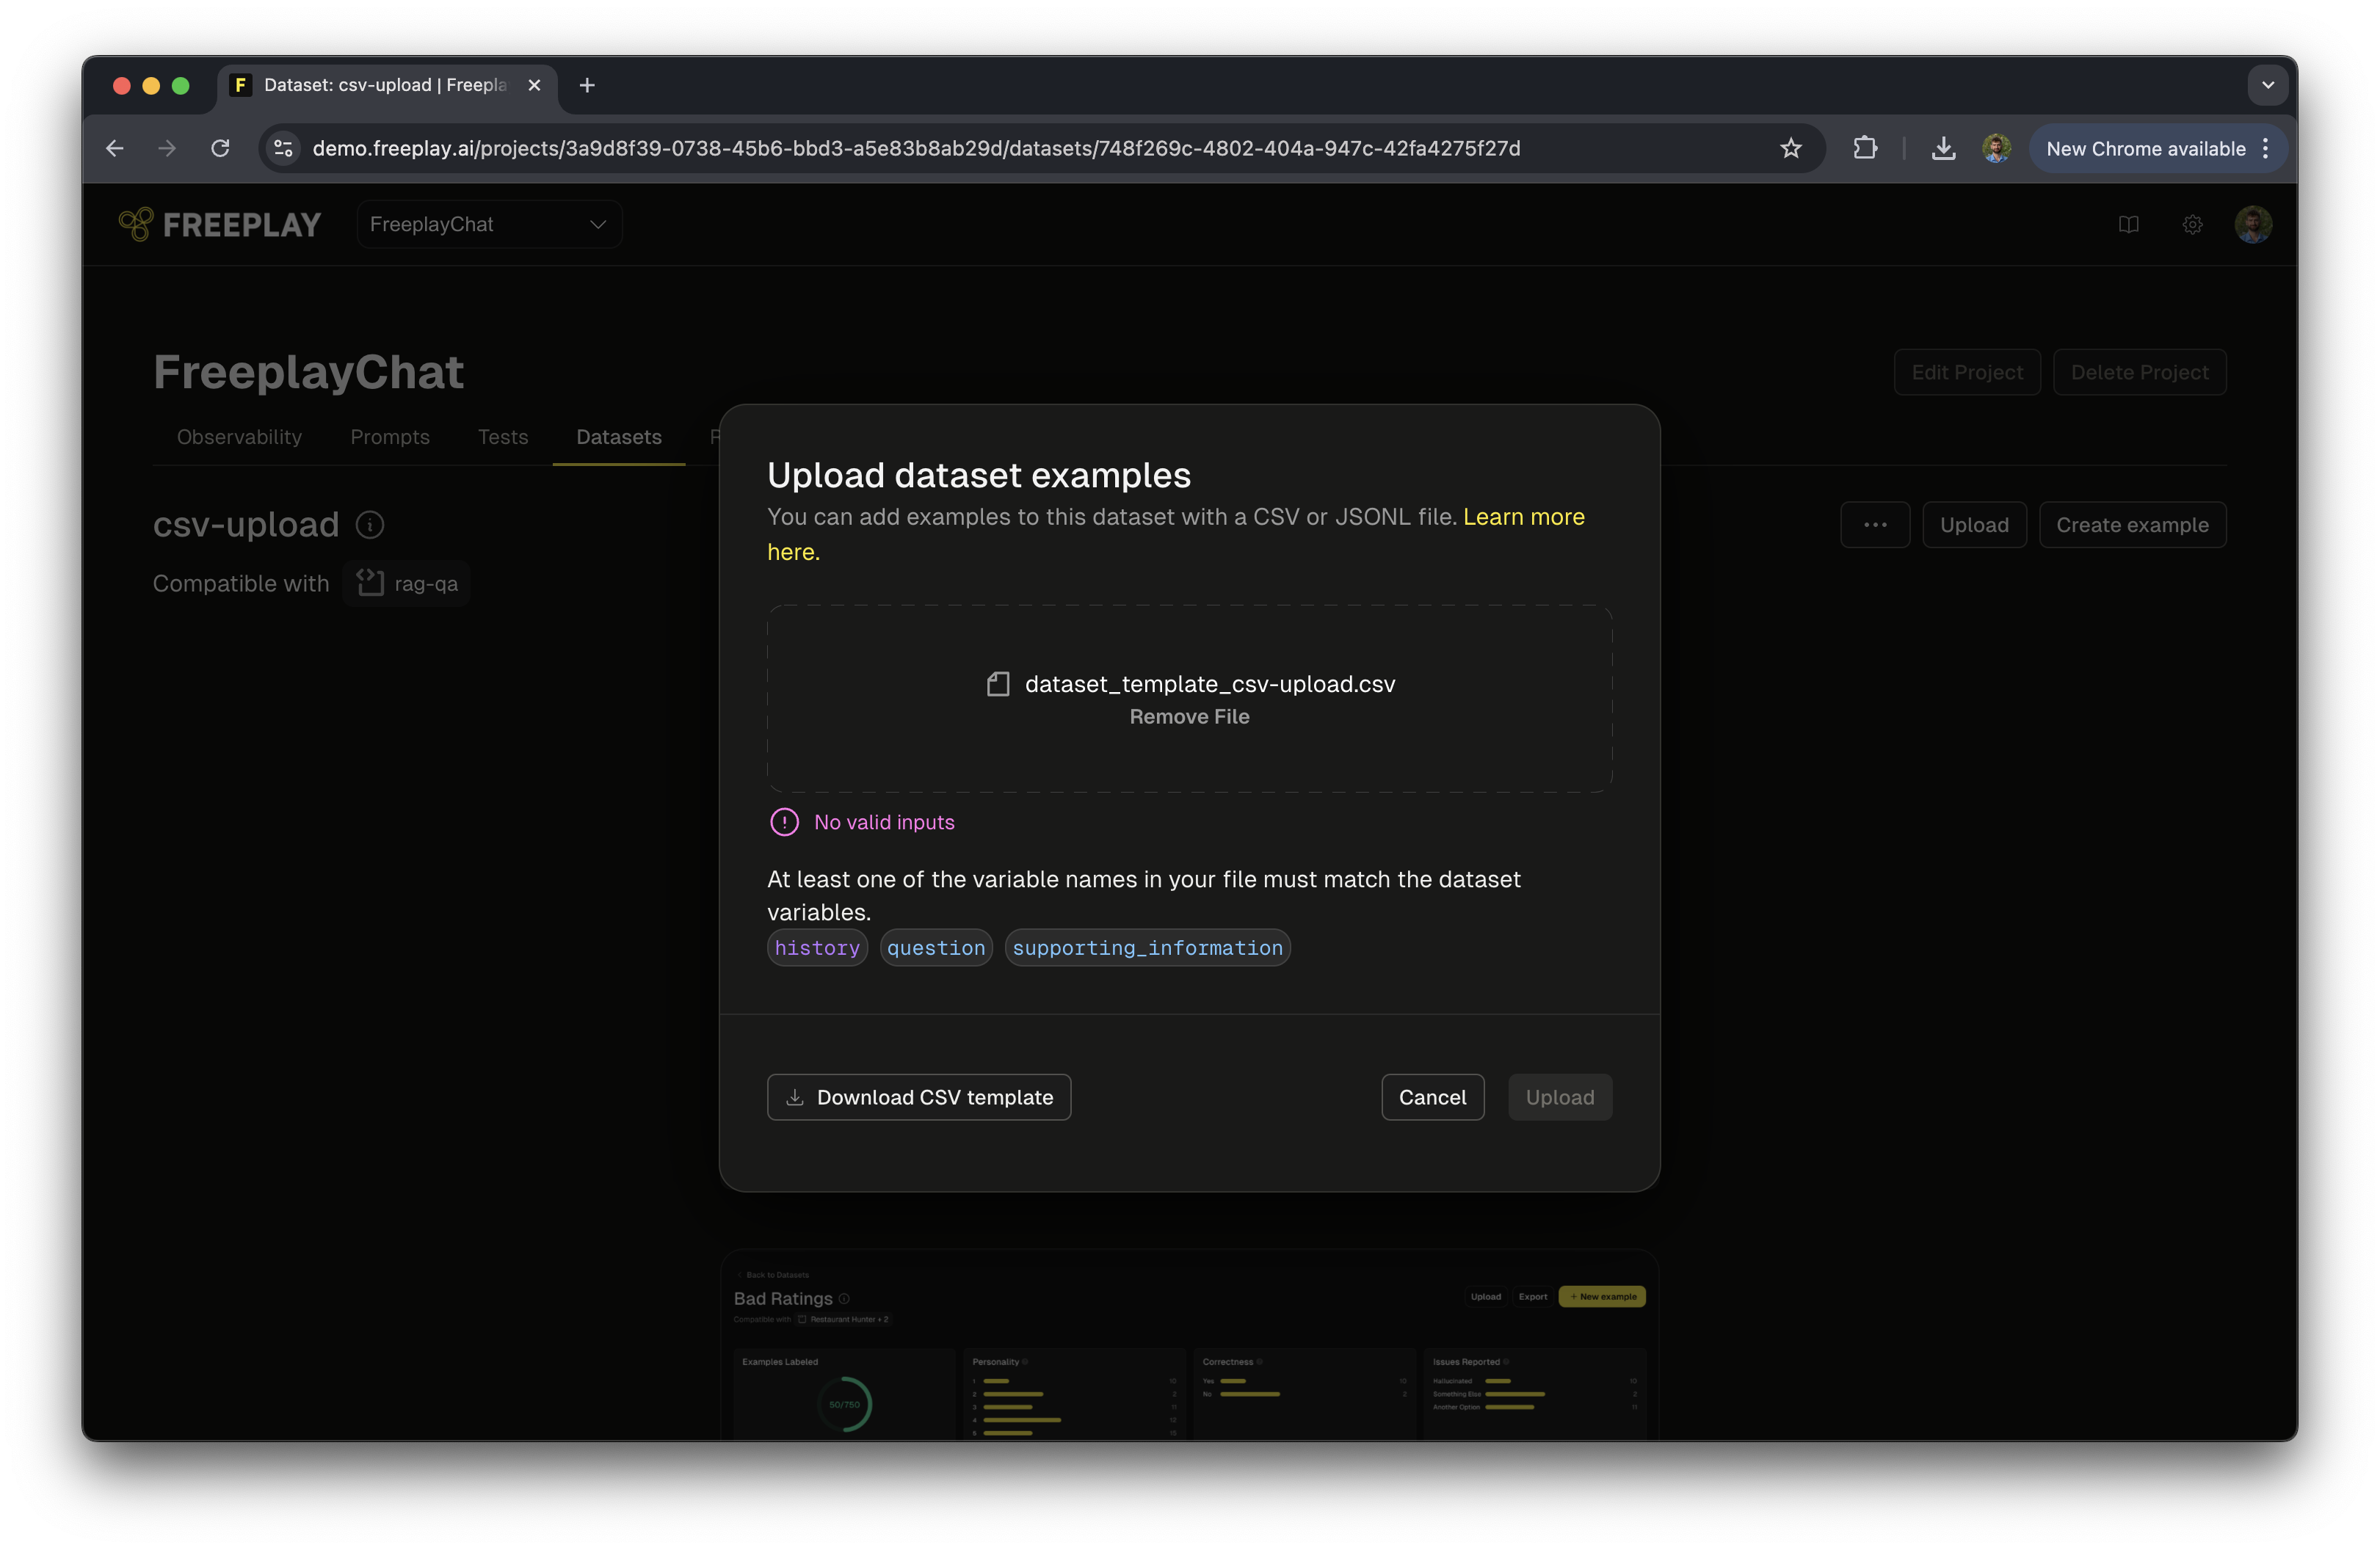
Navigate to the Dataset and click the Upload button.
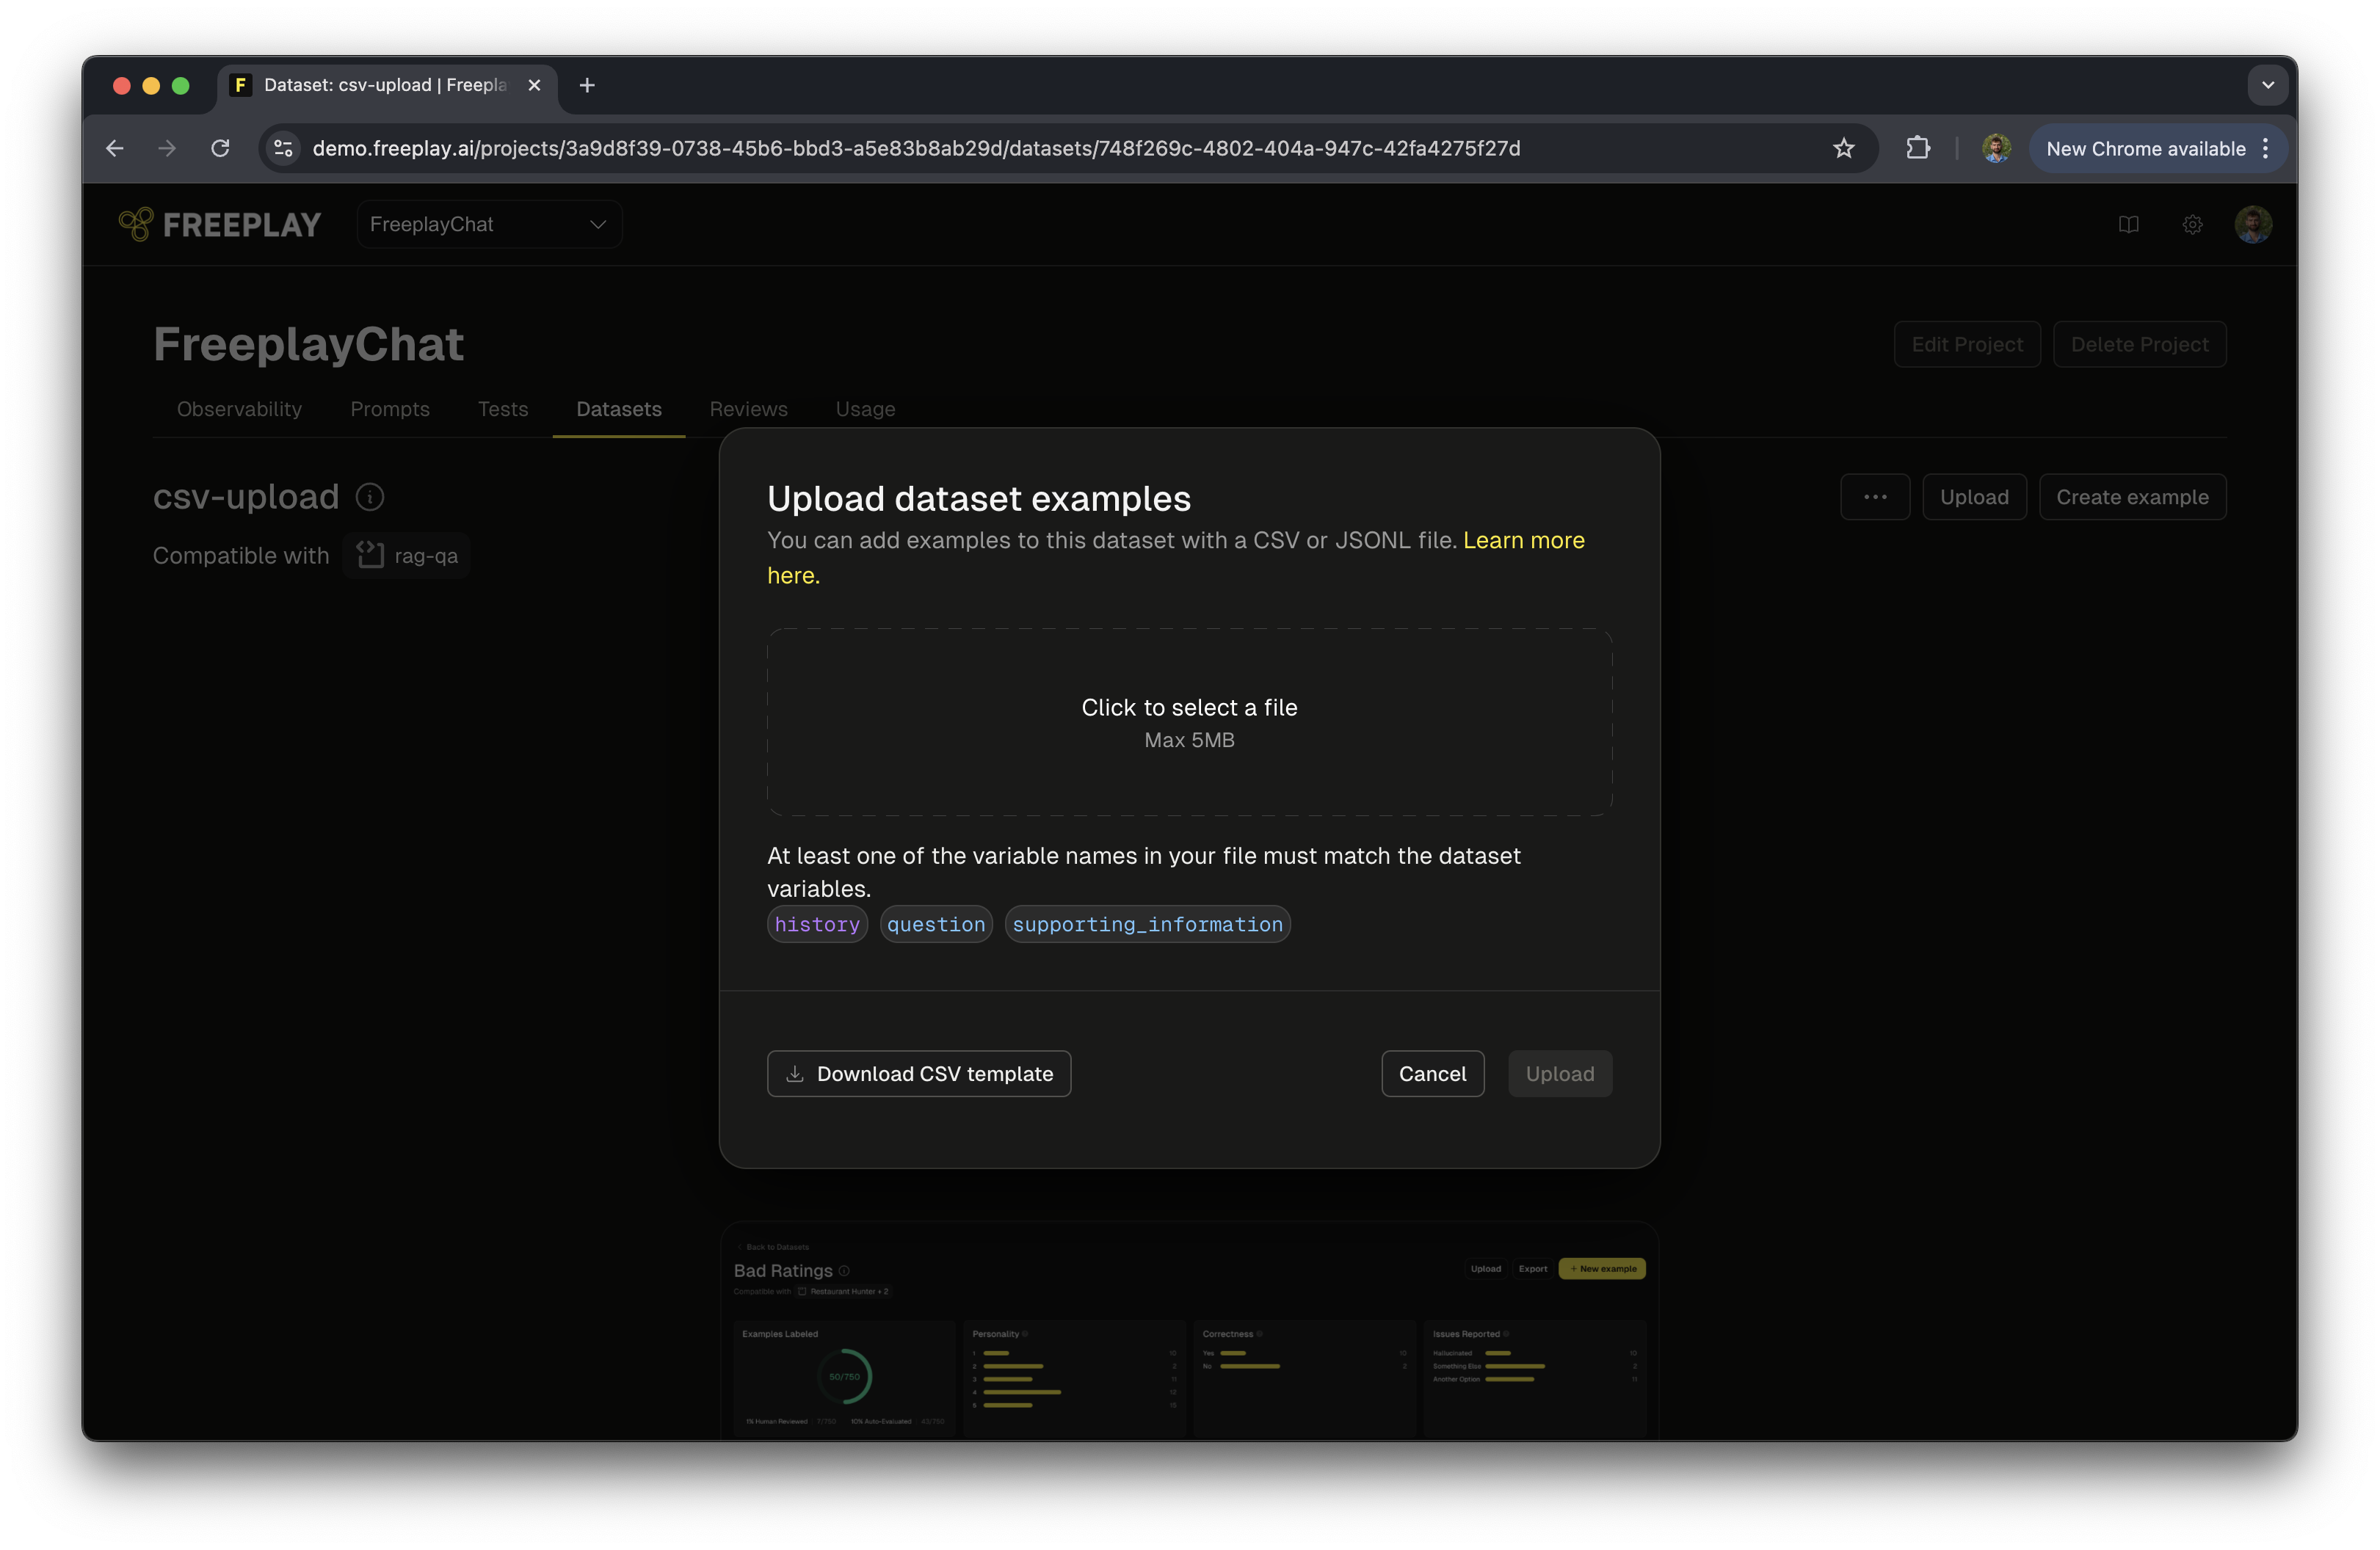
-
For CSV uploads, click Download CSV Template in the bottom-left corner of the upload dialog to get a file with the correct column names for your dataset.
- Format your data according to the JSONL or CSV format below, ensuring that each entry aligns with your selected prompt template.
-
Upload your file. If there are any formatting issues, Freeplay will flag them and block the upload with a warning.
JSONL Format
Each line in the file must be a valid JSON object flattened to a single line. Be sure to append the filename with.jsonl. Note that JSONL is NOT normal JSON — see jsonlines.org for the specification.
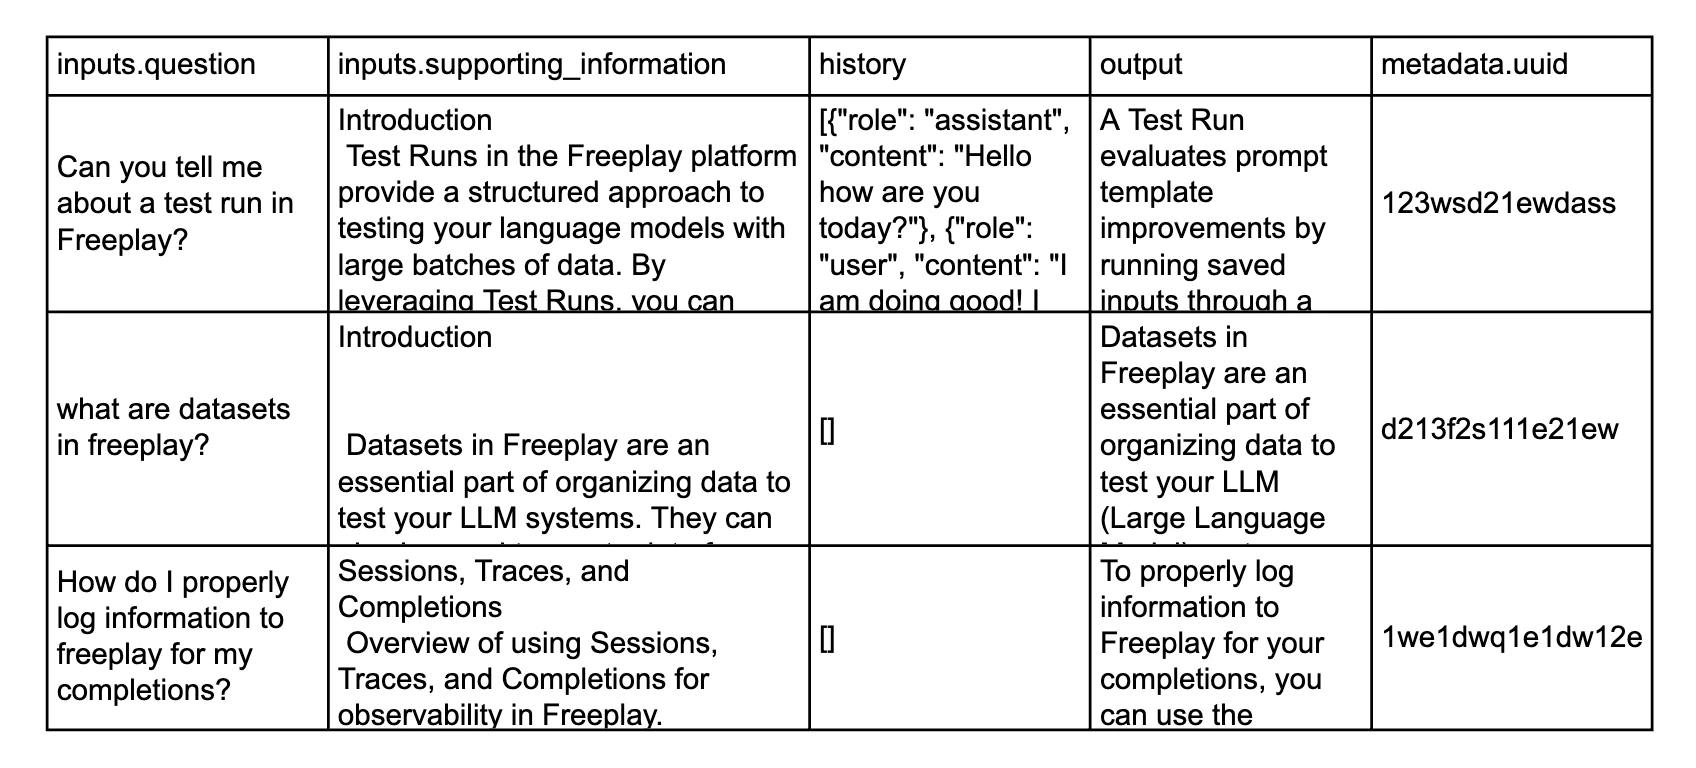
CSV Format
Your CSV must use specific column header prefixes for Freeplay to correctly parse your data. Any columns that don’t follow these conventions will be ignored.
Dataset Compatibility
We’ve found that it’s important to allow for relatively flexible compatibility rules to accommodate complex prompting strategies. The following compatibility rules may be important to know:- Compatibility for testing is based on the input
{{variable_names}}in your prompt templates. These must match with the key names in your Datasets. - A Dataset is treated as compatible if one or more key names match for a given prompt template. This is important so that datasets can be treated as compatible even when some variable names are optional in practice. (See Advanced Prompt Templating Using Mustache)
- Datasets can be used across multiple prompt templates in a Project, as long as at least one variable name is shared. For instance, if you have four prompt templates that all use the variable
{{question}}, then any Dataset that contains values for{{question}}will be compatible.
What’s Next